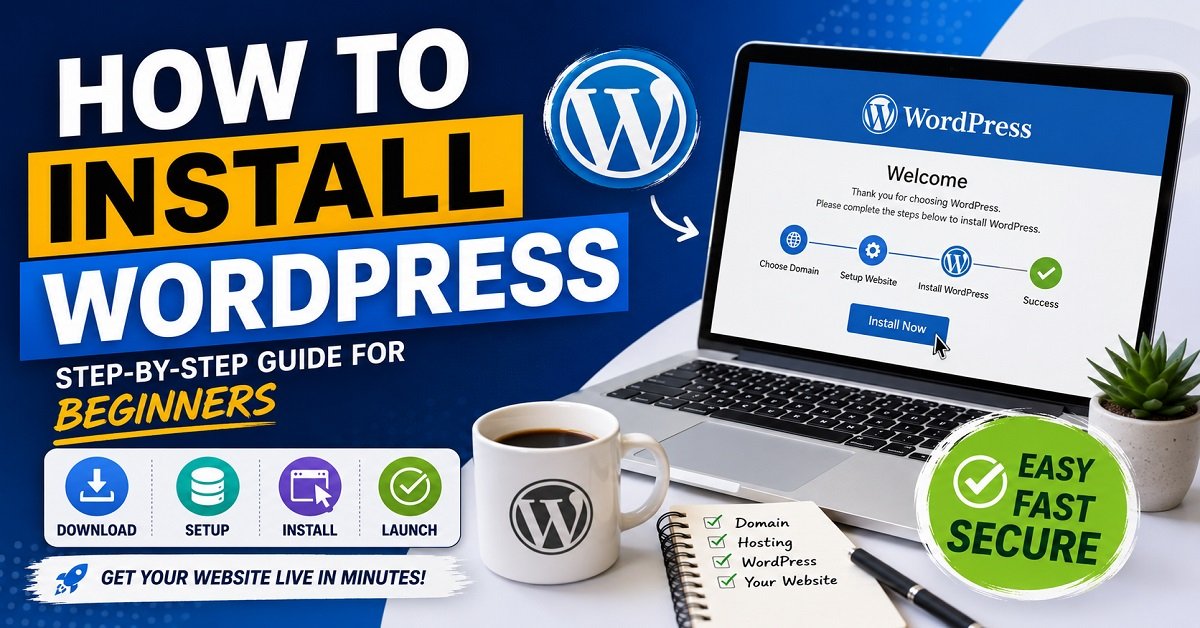
Installing WordPress can sound technical when you’re doing it for the first time.
You may have heard terms such as hosting, databases, DNS, PHP and FTP, and it can make the process seem much more complicated than it really is.
The good news is that you usually don’t need any coding knowledge to install WordPress.
If you already have a domain and web hosting, most beginner-friendly hosting companies provide an automatic WordPress installer that can get your website ready in just a few minutes.
In this guide, we’ll show you how to install WordPress step by step, starting with the easiest method. We’ll also cover the cPanel method and manual installation for people who need it. More importantly, we’ll explain what you should do after WordPress is installed, including important security and basic settings.
By the end, you should know exactly what to do from buying hosting to getting your WordPress dashboard ready for your first article.
What Is the Easiest Way to Install WordPress?
For most beginners, the easiest way to install WordPress is through the automatic WordPress installer provided by your hosting company.
You don’t normally need to download WordPress files, create a database manually or edit configuration files.
Instead, your hosting dashboard usually provides a guided installation process.
The basic process looks like this:
Buy hosting → Connect your domain → Open WordPress installer → Choose your domain → Create administrator login → Install WordPress → Log in to your dashboard
The exact buttons and screen names can vary between hosting companies, but the basic process is very similar.
WordPress itself also notes that many hosting providers offer automatic installation tools, making the installation process easier for beginners.
WordPress installation methods at a glance
There isn’t just one way to install WordPress.
| Installation method | Difficulty | Best for | Recommended? |
|---|---|---|---|
| Hosting auto-installer | Very easy | Beginners | Yes |
| cPanel/Softaculous | Easy | Shared hosting users | Yes |
| Manual installation | Moderate | Advanced users | Usually not for beginners |
| Local installation | Moderate | Testing and development | For specific situations |
If you’re completely new to websites, start with the hosting auto-installer.
There is no benefit in choosing the complicated method simply because it sounds more technical.
What Do You Need Before Installing WordPress?
Before you install WordPress, you need a few basic things.
1. A domain name
Your domain is your website’s address.
For example:
example.com
When someone types your domain into their browser, they should eventually reach your website.
If you haven’t chosen a domain yet, you can first read our guide on [how to choose a domain name].
Your domain doesn’t necessarily have to be purchased from the same company where you buy hosting.
You can buy them separately.
However, using the same provider can make the initial setup simpler for a beginner.
2. Web hosting
Your hosting account provides the server space where your WordPress website lives.
Your website’s:
- WordPress files
- Database
- Images
- Themes
- Plugins
- Articles
- Other website data
are stored on the hosting server.
For a new blog, you generally don’t need an expensive server.
A suitable beginner WordPress hosting plan is usually enough to get started.
3. Access to your hosting account
You’ll need the username/email and password you use to log into your hosting provider.
Once logged in, you’ll find the tools needed to create and manage your website.
4. An administrator email address
During installation, you’ll usually be asked for an email address.
Use an email address you regularly access.
This address can be important for:
- WordPress notifications
- Password recovery
- Website administration
- Security alerts
- Other important messages
Don’t enter an email address you rarely check.
5. A strong administrator password
You’ll also create a password for your WordPress administrator account.
This password protects your WordPress dashboard, so don’t use something easy to guess.
Avoid passwords such as:
password123
admin123
yourname123
Instead, use a strong, unique password that you don’t use on another website.
6. Your domain should be connected to the hosting
This is an important step that sometimes confuses beginners.
Suppose you bought:
Domain: Namecheap
and:
Hosting: Hostinger
Your domain needs to point to your hosting account before the website can work correctly.
If your domain and hosting are from the same company, this connection may happen automatically or require very little configuration.
If they are from different companies, you may need to update the domain’s DNS or nameservers.
Don’t worry if those terms sound complicated.
The basic idea is simple:
Your domain needs to tell the internet where your website is hosted.
If this connection hasn’t been completed, you may install WordPress successfully but still not see the website when you visit your domain.
Do You Need to Buy WordPress?
No.
This is one of the most common questions beginners ask.
WordPress itself is free and open-source software.
You don’t purchase a WordPress license before installing it on your hosting account.
Your main costs normally come from:
- Domain
- Hosting
- Optional premium themes
- Optional premium plugins
- Other services you choose to use
This is also why it’s important to understand the difference between WordPress itself and the services used to run a WordPress website.
If you’re still deciding how much money you need for your website, our guide on [how much it costs to start a blog] explains the different costs in more detail.
WordPress.org vs WordPress.com
Before continuing, there’s another point worth clearing up.
You may have seen both WordPress.org and WordPress.com and wondered whether they are the same thing.
They are related, but they are not the same service.
WordPress.org
WordPress.org provides the WordPress software that you can install on your own hosting.
With this approach, you normally have greater control over:
- Your website
- Themes
- Plugins
- Monetization
- Website files
- Hosting
- Customization
This is the setup we’re talking about in this guide.
WordPress.com
WordPress.com is a hosted platform.
Your hosting is provided as part of the service, and the available features depend on the plan you choose.
It can be suitable for some users, but the setup and pricing structure are different.
If you’re unsure which one is right for you, our [WordPress.org vs WordPress.com comparison] can help you understand the differences.
What Are the WordPress Hosting Requirements?
You don’t need to memorize technical server requirements to install WordPress.
A good WordPress hosting provider should already have the appropriate server environment.
However, it’s useful to know what WordPress currently recommends.
The WordPress project recommends hosting that supports:
- PHP 8.3 or newer
- MySQL 8.0 or newer
- MariaDB 10.11 or newer
- HTTPS
WordPress also recommends Apache or Nginx as suitable web servers.
What does this mean for a beginner?
You don’t normally need to install PHP, MySQL or MariaDB yourself.
Think of it like buying a car.
You don’t need to manufacture the engine before driving the car.
Similarly, with managed or beginner-friendly WordPress hosting, the hosting company provides the server environment needed to run WordPress.
Your job is mainly to:
Choose the hosting plan → connect your domain → install WordPress.
This is one reason choosing suitable hosting is important.
Why HTTPS Matters
You may notice that modern websites use:
instead of:
http://example.com
The extra S means the connection uses HTTPS.
HTTPS helps protect information transferred between the visitor’s browser and your website.
For a modern website, HTTPS is important for both security and user trust.
Many hosting providers include an SSL certificate with their hosting plans, which allows you to use HTTPS.
After installing WordPress, always check whether your website opens correctly using:
rather than assuming everything is configured correctly.
Before You Click “Install”: Check These Things
Before starting the installation, take a minute to check your setup.
Quick checklist
| Check | What you should have |
|---|---|
| Domain | Registered and available for your website |
| Hosting | Active hosting account |
| Domain connection | Domain pointing to the correct hosting |
| Admin email | An email address you can access |
| Admin password | Strong and unique |
| HTTPS | SSL available/enabled |
| Website name | Name you want visitors to see |
| Installation location | Correct domain selected |
This small check can save you from having to troubleshoot problems later.
Method 1: Install WordPress Using Your Hosting Provider
Now let’s get to the easiest method.
The exact screens will differ depending on your hosting company, but the overall process is similar.
For example, current Hostinger hosting provides an Auto Installer that guides users through WordPress installation. Its current workflow includes selecting WordPress, choosing the domain and entering administrator information.
Other hosting companies may call their tool:
- WordPress Installer
- WordPress Manager
- Auto Installer
- One-Click Install
- Website Installer
The name may be different, but you’re looking for a tool that allows you to install WordPress without manually uploading the software.
Step 1: Log In to Your Hosting Account
Open your hosting provider’s website and log into your account.
After signing in, you should see your hosting dashboard.
The dashboard may contain options such as:
- Websites
- Hosting
- Domains
- Files
- Databases
- WordPress
- Website management
The exact layout depends on your hosting company.
Don’t worry if your dashboard doesn’t look exactly like someone else’s tutorial.
What matters is finding the WordPress installation or website setup option.
Step 2: Find the WordPress Installer
Look through your hosting dashboard for an option related to WordPress.
For example, it may say:
Install WordPress
or:
WordPress → Install
or:
Create Website → WordPress
Some hosts may show WordPress alongside other website applications.
If you see a WordPress logo or an option specifically mentioning WordPress, that’s usually the one you need.
Why use the hosting installer?
Because the hosting company handles much of the technical work for you.
Instead of manually:
- Downloading WordPress
- Uploading files
- Creating a database
- Creating a database user
- Editing configuration files
the installer handles these tasks automatically.
That’s why this is the preferred method for most beginners.
Step 3: Select WordPress
Once you’ve opened the installer, choose WordPress.
You may be asked whether you want to create a new WordPress website or install WordPress on an existing website.
Choose the option to create or install a new WordPress website.
The wording can vary.
The goal is simply to tell the hosting system:
“I want WordPress installed on this website.”
Step 4: Choose Your Domain
This is an important step.
You’ll normally be asked where you want to install WordPress.
If your domain is:
myblog.com
and you want your WordPress website to open directly at:
select that domain.
Be careful with the directory field
Some installers may show a field called:
Directory
or:
Installation path
If you want WordPress to load directly from your main domain, you normally don’t want to accidentally install it in a subfolder such as:
myblog.com/wordpress
or:
myblog.com/blog
For a standard blog, you usually want the installation at the root of the domain.
That means the website loads at:
rather than:
The exact setting depends on your hosting installer, so read the label carefully before continuing.
Step 5: Enter Your Website Information
The installer will usually ask for basic website information.
This may include:
Website title
This is the name of your website.
For example:
OrbiElf
You can change this later, so don’t worry if you haven’t finalized your branding.
You may also see a field for:
Website description/tagline
This is optional in many installers.
You can add a short description or leave it for later.
Step 6: Create Your WordPress Administrator Account
This is one of the most important steps.
You’ll normally need to provide:
- Administrator username
- Administrator password
- Administrator email
The administrator account is the account you’ll use to manage your WordPress website.
Don’t use “admin” as your username
If the installer allows you to choose the username, don’t automatically use:
admin
Choose something unique instead.
Hostinger’s current WordPress installation guidance also recommends using a unique administrator username rather than a generic one.
The reason is simple.
A website’s login page is a common target for automated attacks.
Using a less predictable username removes one obvious piece of information an attacker might otherwise know.
Use a strong password
Make your password long and unique.
Don’t reuse your hosting password or your email password.
If your hosting provider offers a password generator, you can use it to create a strong password and store it safely in a reputable password manager.
Step 7: Select the WordPress Version and Other Options
Depending on your hosting provider, you may see additional settings.
These can include:
- WordPress version
- Website language
- Automatic updates
- Plugin installation
- Theme selection
The exact options differ between hosting companies.
If you’re given a choice of WordPress versions, use the current stable version offered by your hosting provider unless you have a specific reason to use another version.
For automatic updates, choose settings that help you keep WordPress secure while still making sure you have a reliable backup strategy.
Don’t enable every optional feature just because it’s offered.
Step 8: Start the Installation
Once you’ve checked the domain, website information and administrator details, start the installation.
Depending on your hosting company, the button might say:
Install
Create Website
Finish Setup
or something similar.
The installer will then create the WordPress files and database and configure the website.
This may take only a few moments.
Don’t close the page while the installation is in progress unless the hosting provider specifically tells you that you can.
Step 9: Wait for the Installation to Complete
Once the installation finishes, your hosting provider should display a confirmation message.
You may also see links such as:
Website URL
and:
WordPress Admin
Your website URL will normally look like:
Your WordPress login URL will normally look like:
The exact login URL can vary if your website uses additional security tools, but /wp-admin is the standard WordPress administration address.
Step 10: Open Your Website
Click the website link or enter your domain in a new browser tab.
For example:
If everything is configured correctly, you should see your WordPress website.
Don’t worry if it doesn’t look like the polished websites you see online.
Installing WordPress gives you the website system, not a finished design.
The next stages are choosing a theme, configuring the settings, installing necessary plugins and publishing your content.
Step 11: Log In to the WordPress Dashboard
Now open:
Enter the administrator username and password you created during installation.
After logging in, you’ll see the WordPress Dashboard.
This is the control center for your website.
From here, you can manage:
- Posts
- Pages
- Images
- Themes
- Plugins
- Users
- Comments
- Website settings
At this point, WordPress is installed and you have access to your website.
But don’t immediately start installing dozens of plugins or publishing your first article.
There are a few important settings and security steps you should take first.
That’s where the next stage of your WordPress setup begins.
How to Install WordPress Using cPanel and Softaculous
The automatic installer provided by your hosting company is usually the easiest option.
However, some hosting accounts use cPanel, a popular control panel for managing websites. If your hosting uses cPanel, you may have access to a tool called Softaculous Apps Installer.
Softaculous can install WordPress automatically, so you don’t have to upload WordPress files or create the database manually.
The exact appearance of cPanel can vary between hosting providers, but the basic process is similar.
Step 1: Log In to cPanel
Log in to your hosting account and open cPanel.
Depending on your hosting company, you may find a button such as:
- cPanel
- Manage cPanel
- Control Panel
- Login to cPanel
Once you’re inside cPanel, you’ll see many different sections and tools.
Don’t worry if you see options such as databases, DNS, file managers and other technical settings.
You don’t need most of them for a normal WordPress installation.
Step 2: Find Softaculous Apps Installer
Look for:
Softaculous Apps Installer
You may find it under a section such as Software or Applications.
Open Softaculous and search for WordPress.
Some hosting companies may provide WordPress directly through their own WordPress Manager instead of Softaculous.
If that’s the case, use the WordPress-specific installer provided by your host.
Step 3: Select WordPress
Click WordPress and then look for an option such as:
Install Now
Softaculous will then display the installation settings.
Don’t be concerned if you see more options here than you saw in your hosting provider’s simpler installer.
Most of them have sensible defaults.
Step 4: Choose the Protocol
You may see a field called:
Choose Protocol
You might see options such as:
http://https://http://wwwhttps://www
If your SSL certificate is already active, choose the HTTPS version.
For example:
rather than:
http://yourdomain.com
HTTPS is the preferred setup for a modern website.
If HTTPS isn’t working yet, check your hosting provider’s SSL settings before proceeding.
Step 5: Select Your Domain
Next, choose the domain where you want WordPress installed.
For example:
yourdomain.com
If you have several domains or websites under the same hosting account, make sure you select the correct one.
This is an easy mistake to make, especially if you’re managing multiple websites.
Step 6: Leave the Directory Empty for a Normal Blog
You may see a field called:
In Directory
This is important.
If you want your blog to open at:
you will normally leave this field empty.
If you enter:
blog
WordPress may be installed at:
That’s useful if you intentionally want WordPress inside a subdirectory.
But for a normal standalone blog, you generally want the main domain.
So:
Domain: yourdomain.com
Directory: leave empty
This gives you:
Step 7: Enter Site Settings
You’ll usually be asked for:
- Site Name
- Site Description
- Enable Multisite
For a normal beginner blog, enter your website name and a short description if required.
You normally don’t need to enable WordPress Multisite.
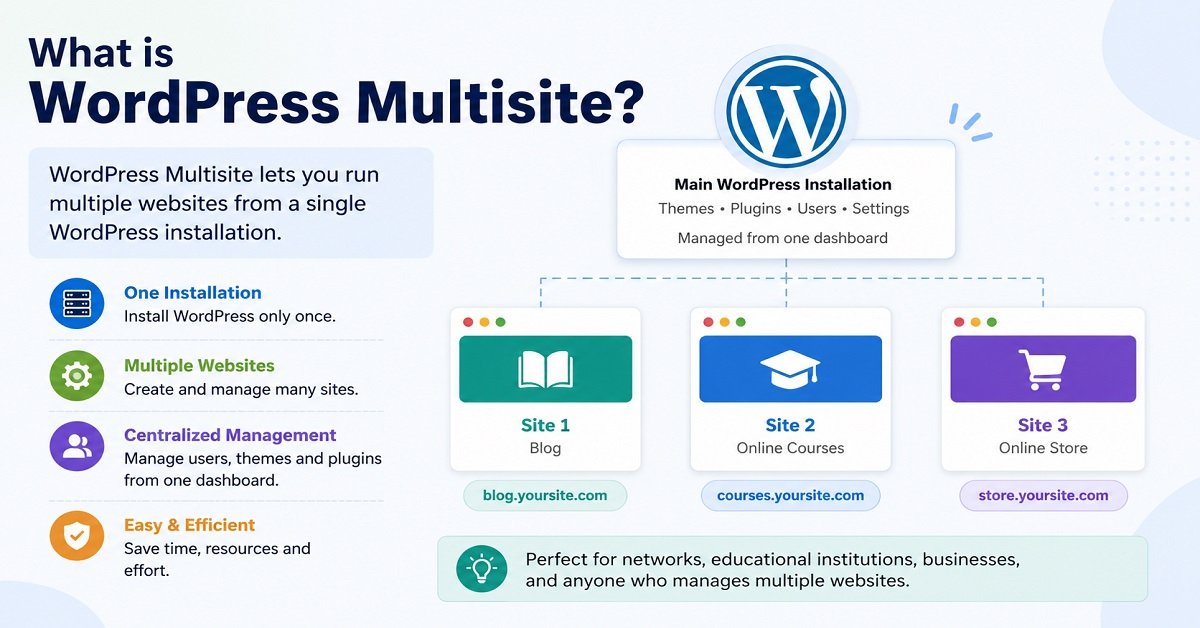
What is WordPress Multisite?
Multisite allows you to run multiple WordPress websites from one WordPress installation.
That’s useful for specific projects, but it isn’t necessary for a normal blog.
If you’re starting your first website, leave it disabled unless you specifically know why you need it.
Step 8: Create Your Administrator Account
Now create the WordPress administrator account.
You’ll usually need:
Admin Username
Admin Password
Admin Email
Again, don’t use an obvious username such as:
admin
Choose something less predictable.
Use a strong, unique password and make sure the administrator email address is correct.
This account will have significant control over your website, so protect it carefully.
Step 9: Choose the Language
You can normally select the language you want WordPress to use.
If you’re writing your blog in English, select English.
You can change various language-related settings later, so this isn’t something you need to worry about too much.
Step 10: Start the Installation
Review the settings.
Make sure:
- The correct domain is selected
- HTTPS is selected if available
- The directory is correct
- Your administrator email is correct
- Your username is not obvious
- Your password is strong
Then click Install.
Softaculous will create the WordPress installation for you.
Once the process finishes, you’ll normally receive a confirmation along with links to your website and WordPress administration area.
How to Log In After Installing WordPress
Your normal WordPress administration URL is:
For example, if your website is:
your dashboard address will normally be:
Enter your administrator credentials and you’ll reach the WordPress Dashboard.
You can also often use:
Both are standard WordPress login routes.
How to Install WordPress Manually
Most beginners won’t need to do this.
But understanding the manual method can be useful if:
- Your hosting doesn’t provide an automatic installer
- The automatic installer isn’t working
- You’re managing a specialized server
- You want more control over the installation
- You’re learning how WordPress works behind the scenes
Manual installation involves more steps because you have to handle the WordPress files and database yourself.
WordPress’s official documentation describes the manual process as downloading the WordPress software, creating a database and database user, uploading the WordPress files, configuring the installation and then completing the setup through the browser.
Let’s look at the process.
Step 1: Download WordPress
Download the current WordPress package from the official WordPress website.
The download will contain the WordPress files needed to run the website.
You don’t need to purchase WordPress.
The software itself is free.
For security, always obtain WordPress from the official WordPress website or through a trusted hosting installer.
Avoid downloading WordPress from random websites.
Step 2: Upload the WordPress Files
After downloading WordPress, you need to upload its files to your hosting server.
You can normally do this through:
- cPanel File Manager
- FTP/SFTP
- Another file management tool provided by your host
If you’re installing WordPress on the main domain, the files generally need to be placed in the website’s document root.
For a cPanel account, this might be a folder such as:
public_html
However, the exact folder can vary depending on your hosting configuration.
Step 3: Create a Database
WordPress stores much of your website’s information in a database.
This includes things such as:
- Posts
- Pages
- User information
- Website settings
- Plugin settings
- Theme settings
During a manual installation, you need to create this database yourself.
Depending on your hosting setup, you may use:
MySQL Databases
or a similar database management tool.
You’ll generally create:
- A database
- A database user
- A strong database password
- Permissions allowing that user to access the database
Keep these details safe.
You’ll need them during the WordPress configuration process.
Step 4: Configure WordPress
WordPress needs to know how to connect to the database.
This information is stored in its configuration.
The relevant file is:
wp-config.php
During manual installation, you may need to provide information such as:
- Database name
- Database username
- Database password
- Database host
This is one reason manual installation is more complicated than using an automatic installer.
If you enter incorrect database information, WordPress won’t be able to connect to the database.
Step 5: Open Your Domain
Once the WordPress files are uploaded and the database is ready, visit your domain in a browser.
For example:
WordPress should recognize that the installation hasn’t been completed yet and guide you through the setup process.
Step 6: Choose Your Language
WordPress will ask you to select the language for your installation.
Choose the language you want to use.
Then continue with the installation.
Step 7: Enter the Database Information
You’ll be asked for the database information you created earlier.
This normally includes:
- Database name
- Username
- Password
- Database host
- Table prefix
For many hosting environments, the database host is:
localhost
But don’t assume this is always the case.
Use the value provided by your hosting company if it gives you a different database host.
What is the table prefix?
You may see something like:
wp_
This is the default WordPress database table prefix.
It can be changed to a different value during installation.
For beginners, the important thing is to understand that the prefix helps WordPress identify its database tables.
Don’t change it randomly after installation.
Step 8: Run the Installation
If WordPress can successfully connect to your database, you’ll be taken to the main installation screen.
You’ll enter:
- Site title
- Administrator username
- Administrator password
- Administrator email
Then click the button to install WordPress.
WordPress will complete the installation.
Step 9: Log In to Your Dashboard
Once the installation is complete, go to:
Log in with the administrator account you created.
You should now see the WordPress Dashboard.
Should Beginners Install WordPress Manually?
Usually, no.
If your hosting company provides a reliable automatic installer, there’s little reason to make the process more complicated.
Manual installation is useful when you have a specific reason to use it.
For example, a developer working on a custom server may need manual control over the installation.
But if you’re someone who simply wants to start a blog, the automatic installer is usually the better choice.
Why automatic installation is better for beginners
It generally handles many technical tasks for you.
You don’t need to manually:
- Upload WordPress files
- Create a database
- Create database users
- Configure
wp-config.php - Set database permissions
That reduces the chances of making a configuration mistake.
Which WordPress Installation Method Should You Use?
Here’s the simple answer:
| Your situation | Best method |
|---|---|
| First WordPress website | Hosting auto-installer |
| Hosting has WordPress Manager | WordPress Manager |
| cPanel hosting | Softaculous/cPanel installer |
| No automatic installer | Manual installation |
| Developer/testing server | Manual or local installation |
If you’re a beginner, don’t choose the manual method just because it sounds more professional.
The easiest method is usually the best method.
The goal isn’t to prove that you can configure a database manually.
The goal is to get your website online correctly and safely.
What Happens After WordPress Is Installed?
This is where many WordPress tutorials stop.
They tell you:
“WordPress installed successfully.”
And that’s technically true.
But your website isn’t really ready yet.
Installing WordPress is only the foundation.
Think of it like moving into an empty house.
The house exists, but you still need to arrange the rooms and make it suitable for living.
Similarly, after installing WordPress, you still need to:
- Check your website
- Confirm HTTPS works
- Configure basic settings
- Choose a theme
- Install necessary plugins
- Set up backups
- Improve security
- Create important pages
- Configure your URLs
- Start publishing content
First, Check Whether Your Website Works
Open your domain.
For example:
Check it from a normal browser window.
Then try your WordPress dashboard:
Make sure both work.
Check the HTTPS version
Your website should preferably load through HTTPS.
Try:
If the browser displays a security warning, don’t ignore it.
Check your hosting account and SSL settings.
An SSL certificate is often provided by the hosting company, but you still need to make sure it is active and correctly configured.
Check Your WordPress Dashboard
After logging in, you’ll see several menu items.
The exact appearance can change depending on your WordPress version and installed plugins, but you’ll generally find sections such as:
Posts
Used for your blog articles.
Pages
Used for relatively permanent website pages such as About and Contact.
Media
Contains images and other uploaded media.
Appearance
Used for themes and website design.
Plugins
Used to add functionality to WordPress.
Users
Used to manage website users and administrator accounts.
Settings
Contains many of the basic WordPress configuration options.
You don’t need to understand everything immediately.
Start with the sections that matter to your website.
Don’t Install Dozens of Plugins Immediately
Once you see the Plugins section, you may be tempted to install everything you think you’ll need.
Don’t.
Start with a small number of genuinely useful plugins.
For example, depending on your website’s needs, you may eventually need tools for:
- SEO
- Backups
- Security
- Contact forms
- Performance
- Analytics
But the exact plugin list depends on what you’re building.
A blog doesn’t need the same plugins as an online store.
An affiliate website doesn’t need the same plugins as a membership website.
The better approach is:
Identify a problem first, then install a plugin that solves it.
This can help keep your WordPress website easier to maintain.
Don’t Start Customizing Everything Yet
A newly installed WordPress website may look very basic.
That’s normal.
You may want to immediately change:
- Fonts
- Colors
- Header
- Footer
- Homepage
- Menus
- Widgets
- Layout
- Buttons
But before spending hours on design, make sure your basic website setup is correct.
A simple website with useful content is more valuable than a beautifully designed website with nothing useful to read.
Your next major step should be basic WordPress configuration and security.
That includes checking your site title, timezone, URLs, permalinks, user account, backups and other important settings before you start publishing.
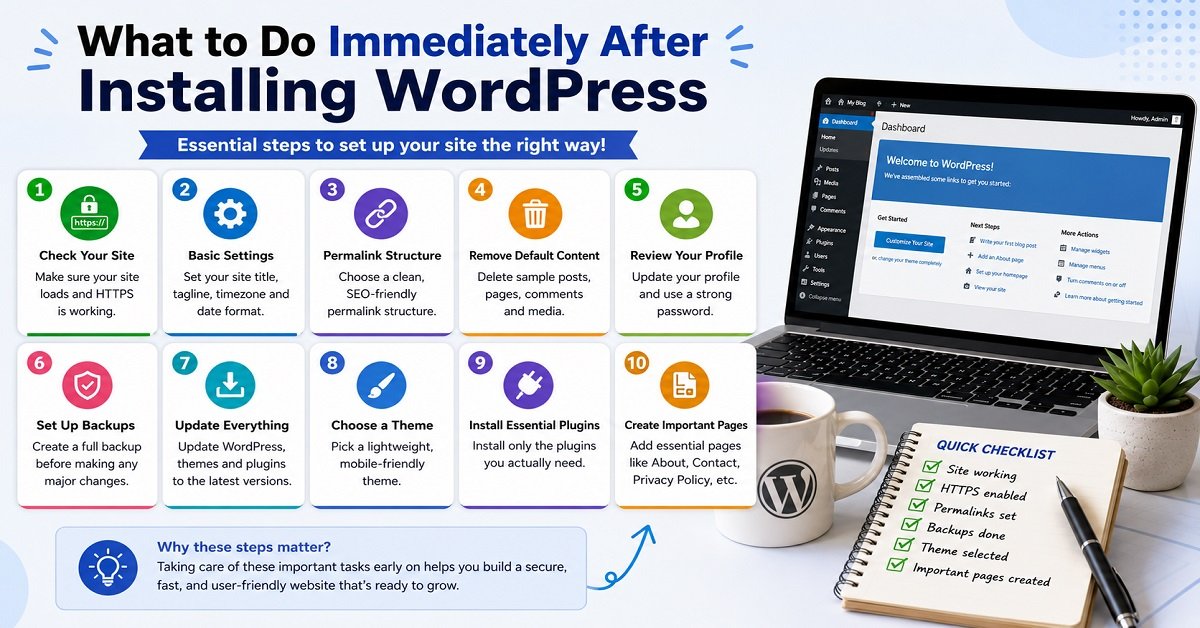
What to Do Immediately After Installing WordPress
Your WordPress installation is now complete, but don’t rush to publish your first article yet.
There are a few basic settings you should check first.
Doing this now can save you from having to fix avoidable problems later.
Think of WordPress installation as setting up the foundation of your website. The next step is configuring that foundation properly.
1. Check Your Website Address
Go to:
Make sure your website opens correctly.
Then open:
and confirm that you can access your WordPress dashboard.
Also check whether your website is using HTTPS.
Your preferred version should normally look like:
rather than:
http://yourdomain.com
If your hosting provider has included an SSL certificate, HTTPS may already be working.
If it isn’t, check the SSL settings in your hosting account before continuing.
2. Set Your Site Title and Tagline
From the WordPress dashboard, go to:
Settings → General
You’ll normally find options such as:
Site Title
and
Tagline
The site title is usually your website or brand name.
For example:
OrbiElf
The tagline is a short description of what the website is about.
You don’t necessarily need a clever tagline.
If you don’t have one yet, you can leave it simple or update it later.
Why is this important?
The site title can appear in different places, including your website header and browser-related information, depending on your theme and settings.
So make sure the name is correct before you start publishing.
3. Check Your WordPress URL and Site URL
You’ll also see fields for:
WordPress Address (URL)
and
Site Address (URL)
For a standard WordPress installation, these will usually be the same.
For example:
Don’t change these settings casually.
If you change them incorrectly, you can make your website or WordPress dashboard inaccessible.
If your website is already working correctly, there is usually no reason for a beginner to modify these URLs.
4. Set the Correct Timezone
This is a small setting, but it’s worth checking.
Go to:
Settings → General → Timezone
Choose the timezone that matches where you want your website’s publishing schedule to be based.
This is especially important if you use scheduled posts.
Imagine you schedule an article for 8:00 AM but WordPress is configured for a different timezone.
The article may not publish at the time you expected.
Set the correct timezone now so you don’t have to troubleshoot publishing times later.
5. Choose Your Date and Time Format
While you’re in the General Settings area, you’ll also find options for date and time formats.
Choose a format that makes sense for your readers.
This isn’t a major SEO setting, so don’t spend too much time worrying about it.
The important thing is consistency.
6. Configure Your Permalink Structure
This is one of the most important settings to check before publishing articles.
Go to:
Settings → Permalinks
WordPress gives you different URL structures.
For a blog, a simple and readable URL structure is usually preferable.
For example:
is easier to understand than:
A clean URL also makes it easier for visitors to understand what a page is about.
A good beginner-friendly structure
For many blogs, the Post name option is a simple choice.
It produces URLs based on the post’s slug.
For example:
Article title:
How to Install WordPress
URL:
Do this before publishing lots of articles
Changing your permalink structure after your website has accumulated many indexed pages can create unnecessary URL changes and redirects.
So choose your preferred structure early.
If you’re building a new blog, this is the best time to make the decision.
7. Delete Unnecessary Default Content
A new WordPress installation may contain sample content.
You might see a default post or page.
If you don’t need it, remove it.
Check:
Posts → All Posts
and:
Pages → All Pages
Also check:
Comments
for any default or unwanted content.
You don’t want sample content sitting on your public website.
8. Check Your User Account
Go to:
Users → Profile
Review your administrator profile.
Make sure the email address is correct.
You may also want to configure your display name.
Don’t expose your administrator username unnecessarily
Your login username doesn’t need to be the same as the name you display publicly as the author.
For example, your login account could have a unique username while your articles display your real name or brand name.
This gives you more flexibility and avoids unnecessarily exposing your login username.
9. Set Up Backups Before Making Major Changes
This is one step I strongly recommend doing early.
A backup gives you a way to recover your website if something goes wrong.
Problems can happen after:
- Installing a plugin
- Updating a theme
- Updating WordPress
- Changing website files
- Making configuration changes
- Migrating the website
Your hosting provider may include backups with your plan, but check exactly what is included.
Find out:
- How frequently backups are created
- How long they are retained
- Whether you can restore them yourself
- Whether backups are stored separately from your website
Don’t assume “my hosting has backups” means you’re fully protected
It’s worth understanding how the backup system actually works.
For an important website, having an additional backup strategy can provide extra protection.
The general rule is simple:
Before making a major change, make sure you have a recent backup.
10. Keep WordPress Updated
WordPress releases updates for new features, improvements and security fixes.
You should keep your WordPress installation reasonably up to date.
The same applies to:
- Themes
- Plugins
But don’t blindly install updates without thinking about your backup strategy.
A good workflow is:
Backup → Update → Check the website
If something goes wrong, you have a recovery point.
11. Remove Themes and Plugins You Don’t Need
New WordPress installations may come with themes or plugins that you don’t plan to use.
You don’t need to keep every theme installed.
You can keep one fallback theme if you want, but remove themes you know you won’t use.
The same principle applies to plugins.
An unused plugin doesn’t provide any benefit.
Keeping your installation clean makes maintenance easier and reduces unnecessary components that need to be monitored and updated.
12. Choose a WordPress Theme
Now you can start working on the appearance of your website.
Go to:
Appearance → Themes
You’ll find the theme currently active on your website.
A theme controls many visual aspects of your website, including:
- Layout
- Typography
- Colors
- Header
- Footer
- Blog archive
- Article layout
- Navigation
Do you need a premium theme?
No.
A good free theme can be perfectly adequate when you’re starting.
Don’t feel that you need to spend thousands of rupees on a theme before publishing your first article.
Instead, choose a theme that:
- Loads reasonably quickly
- Works well on mobile
- Is regularly maintained
- Has the features you actually need
- Gives you enough customization options
If you later discover that you need more control, you can consider upgrading.
13. Create the Essential Pages
Before you start seriously promoting your website, create the basic pages your readers may expect to find.
These can include:
About page
Tell readers:
- What the website is about
- Who creates the content
- What readers can expect
Contact page
Give visitors a way to contact you.
Privacy Policy
A privacy policy is important if your website collects or processes visitor information, uses analytics, advertising, forms, cookies or similar technologies.
Terms and conditions
Depending on your website and activities, you may also want a terms page.
Affiliate disclosure
If you’re using affiliate links, clearly disclose your affiliate relationships where appropriate.
Don’t copy another website’s legal pages blindly.
Your policies should accurately reflect what your own website does.
14. Set Up Your Navigation Menu
Once your important pages exist, create a simple navigation structure.
A beginner blog doesn’t need a complicated menu with 20 items.
Keep it easy to understand.
For example:
Home | Blog | About | Contact
As your website grows, you can add categories or other important sections.
The goal is to help visitors quickly understand where they are and where they can go next.
15. Configure Your Homepage
WordPress can display your latest blog posts on the homepage, or you can create a separate static homepage.
Which option is better depends on the type of website you’re building.
For a traditional blog
Showing recent posts can work well.
For a business or content website
A custom homepage may make more sense.
You can introduce:
- What the website is about
- Main categories
- Important guides
- Featured content
- Products or services
You don’t need to make this decision permanent.
WordPress allows you to change how your homepage works later.
16. Install Only the Plugins You Actually Need
Now that your basic website is configured, you can think about plugins.
But don’t fall into the “install everything” trap.
Start with the functions your website actually requires.
For example, a new blog might eventually need plugins for:
- SEO
- Backups
- Security
- Performance
- Contact forms
- Analytics integration
The exact list will depend on your website.
A plugin should solve a problem
Before installing a plugin, ask:
What problem is this plugin solving?
If you don’t have a good answer, you probably don’t need it yet.
This approach can keep your website easier to maintain.
17. Configure Your SEO Basics
You don’t need to become an SEO expert before publishing your first article.
But there are a few basics worth setting up.
You should eventually have:
- Search engine-friendly URLs
- An SEO plugin if you want one
- XML sitemap
- Google Search Console
- Analytics
- Clear page titles
- Useful meta descriptions
- Logical internal linking
Your SEO plugin can help with some of these tasks, but don’t assume installing an SEO plugin automatically makes your website SEO-friendly.
The plugin is a tool.
Your content and website structure still matter.
If you want to understand the broader process, you can link this section to [how to do SEO for a new blog].
18. Connect Google Search Console
Google Search Console is a useful free service for website owners.
It can help you understand how Google sees your website.
Once your site is ready, you can use Search Console to monitor things such as:
- Search impressions
- Clicks
- Search queries
- Indexing
- Search performance
- Some technical issues
You don’t need to check it every hour.
But connecting it early means you can start collecting useful data as your website grows.
19. Check Your Website on a Mobile Phone
This is an easy step to forget.
Open your website on your phone.
Check:
- Is the text readable?
- Does the menu work?
- Are buttons easy to tap?
- Are images fitting correctly?
- Does anything overflow horizontally?
- Can visitors easily navigate between pages?
A website that looks excellent on your desktop monitor can still have problems on a phone.
Since many readers browse websites from mobile devices, always check the mobile version before considering the setup complete.
20. Test Your Contact Form
If you’ve created a contact form, actually test it.
Send yourself a message.
Then check whether:
- The form submits successfully
- You receive the email
- The visitor sees a confirmation
- The email isn’t consistently going to spam
It’s much better to discover a broken contact form yourself than to discover it after a reader tells you they couldn’t contact you.
Common WordPress Installation Problems
Even when you follow the correct steps, things can occasionally go wrong.
Here are some common problems beginners may encounter.
“My domain isn’t showing my WordPress website”
This can happen when the domain hasn’t been correctly connected to the hosting account.
If your domain and hosting are from different providers, check whether the required nameserver or DNS changes have been completed.
Also remember that DNS changes may take some time to propagate.
“I installed WordPress but I’m seeing an error”
Don’t immediately reinstall WordPress.
First check:
- Is the domain pointing to the correct hosting account?
- Is HTTPS configured?
- Did the installation actually complete?
- Is there a hosting/server issue?
- Did you install WordPress in the correct directory?
Reinstalling without understanding the problem can sometimes make troubleshooting harder.
“I can’t access wp-admin”
First check that you’re using the correct URL:
Then verify your username and password.
If the website itself works but the login doesn’t, the problem may be related to the login credentials or a plugin/security configuration.
“I get a database connection error”
This is more common with manual installations.
It can happen if WordPress cannot connect to the database because the database name, username, password or host information is incorrect.
If you used an automatic hosting installer and encounter this problem, contact the hosting provider because they may be able to identify the server-side issue more quickly.
“My website looks completely different from the tutorial”
Don’t panic.
WordPress themes and hosting dashboards can look different.
A tutorial might use one theme while you’re using another.
The WordPress dashboard can also change slightly between versions.
Focus on the function you’re trying to find, rather than expecting every button to appear in exactly the same location.
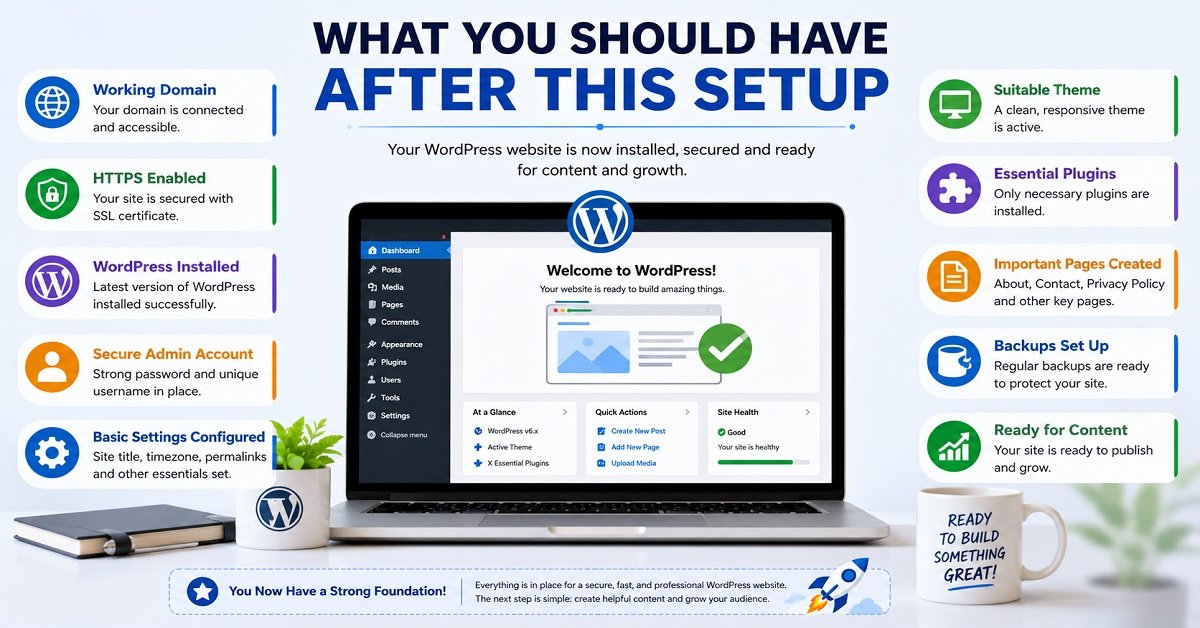
What You Should Have After This Setup
At this point, your WordPress website should have:
- A working domain
- HTTPS
- WordPress installed
- A secure administrator account
- Correct basic settings
- A clean permalink structure
- A suitable theme
- Essential pages
- A basic navigation menu
- A backup plan
- Only necessary plugins
- Basic SEO configuration
- Google Search Console connected
- A mobile-friendly layout
You now have a proper foundation for your blog.
But there is still one important area we need to cover before considering the WordPress setup complete:
security and ongoing maintenance.
Installing WordPress is relatively easy.
Keeping the website secure, updated and recoverable is just as important.
In the final section, we’ll put together a practical WordPress security and launch checklist, explain what to do when something goes wrong, cover the most common beginner questions, and answer the bigger question:
What should you do immediately after installing WordPress if your actual goal is to start a successful blog?
WordPress Security: What You Should Do After Installation
Getting WordPress installed is only the beginning.
Your website is now connected to the internet, so you should take a few basic security precautions before you start building it.
You don’t need to become a cybersecurity expert.
A few simple habits can prevent many common problems.
Use a strong administrator password
Your WordPress administrator account has access to almost everything on your website.
If someone gets access to it, they could potentially:
- Publish or delete content
- Install plugins
- Change your theme
- Create users
- Modify settings
- Damage your website
Use a long, unique password that you don’t use anywhere else.
A password manager can make this easier because you don’t have to memorize complicated passwords.
Don’t use an obvious administrator username
Avoid usernames such as:
admin
administrator
webmaster
or something that’s extremely easy to guess.
If you’ve already created an administrator account with an obvious username, don’t panic. You can create a new administrator account with a unique username, transfer the content to it if necessary, and remove the old account carefully.
Keep WordPress updated
WordPress, themes and plugins receive updates for various reasons, including security improvements and bug fixes.
Don’t leave your website running outdated software indefinitely.
At the same time, don’t blindly update everything on a live website without considering backups.
A sensible habit is:
Backup → Update → Check
If an update causes a problem, you have a recent backup to fall back on.
Remove unused plugins
If you installed a plugin for testing and no longer need it, remove it.
Don’t simply leave dozens of unused plugins sitting on your website.
The same applies to themes.
Keep your WordPress installation clean and manageable.
Install plugins from trustworthy sources
Be careful when downloading WordPress plugins or themes from unknown websites.
A plugin that promises a premium feature for free may come with security risks if it has been modified or distributed illegally.
For most beginners, the official WordPress plugin directory and reputable commercial developers are safer places to obtain plugins.
Set Up Two-Factor Authentication If Available
Two-factor authentication, often called 2FA, adds another layer of protection to your login.
Instead of relying only on your username and password, you may also need to confirm your identity using another method.
For example, you might use an authenticator app.
If your hosting provider, WordPress security solution or other login system supports 2FA, consider enabling it for administrator accounts.
Think of it like adding another lock to your front door.
Even if someone somehow discovers your password, they still have another security barrier to overcome.
Create a Backup Before You Start Making Major Changes
This deserves another reminder because backups are one of the easiest things to ignore until you need one.
Imagine you’ve spent six months publishing 100 articles.
Then you install a plugin that causes a serious problem.
Or an update breaks part of the website.
Or you accidentally change something important.
Without a backup, recovery can become much more difficult.
With a good backup, you may be able to restore the website to a working state.
What should a WordPress backup contain?
Ideally, you want a backup of both:
Website files
and
Database
The database contains much of your actual website content and settings, while the files contain things such as themes, plugins and uploaded files.
A backup system that only saves one of these may not give you a complete website recovery.
WordPress Installation Security Checklist
Before moving on to content creation, go through this quick checklist.
| Security task | Done? |
|---|---|
| Strong administrator password | ☐ |
| Unique administrator username | ☐ |
| HTTPS working | ☐ |
| Backup system configured | ☐ |
| WordPress updated | ☐ |
| Themes updated | ☐ |
| Plugins updated | ☐ |
| Unused plugins removed | ☐ |
| Unused themes removed | ☐ |
| 2FA enabled where appropriate | ☐ |
| Administrator email verified | ☐ |
You don’t have to complete every advanced security measure before publishing your first article.
But these basic steps give you a much better starting point.
What Should You Do After Installing WordPress?
Now let’s look at the bigger picture.
If your goal isn’t simply to experiment with WordPress but to build a real blog, your next steps should be focused on content and your readers.
A sensible order is:
1. Install WordPress
2. Secure the website
3. Configure basic settings
4. Choose a suitable theme
5. Install essential plugins
6. Create important pages
7. Set up analytics and Search Console
8. Plan your content
9. Publish useful articles
10. Improve the website based on real visitor data
This is much better than spending three weeks changing your website colors before publishing anything.
Don’t Spend Too Much Time Designing Your Website
This is a common beginner trap.
You install WordPress and suddenly discover thousands of themes and customization options.
You change the:
- Logo
- Font
- Colors
- Header
- Footer
- Buttons
- Sidebar
- Homepage
- Menus
Then you change them again.
And again.
Before you know it, you’ve spent two weeks designing a website that has three articles.
Your website should look professional and trustworthy, but content should remain the priority.
A simple, fast and easy-to-use website can work very well.
You can improve the design later as your website grows.
Start Planning Your Content
Once WordPress is configured, your next major job is creating content.
Before writing random articles, think about:
- Who is your target reader?
- What problems do they have?
- What questions are they searching for?
- What information can you explain better?
- What topics can you cover consistently?
If you haven’t decided what your website should focus on yet, your next step could be choosing a clear niche.
That’s where an article such as how to choose a blog niche can help.
The goal isn’t simply to publish as many articles as possible.
The goal is to publish articles that give readers a reason to visit your website.
Create Your First Blog Post
Once your website is configured, you can create your first article from:
WordPress Dashboard → Posts → Add New
You’ll see the WordPress block editor.
You can add:
- Headings
- Paragraphs
- Images
- Lists
- Tables
- Videos
- Buttons
- Links
- Other content blocks
You don’t need to learn every block before writing.
Start with the basics.
A simple article structure could be:
Title
Introduction
Main headings
Useful explanations
Examples
Images where helpful
Conclusion
As you publish more articles, you’ll become more comfortable with the editor.
Pages vs Posts: What’s the Difference?
This is another thing beginners often find confusing.
Posts
Posts are generally used for regularly published content.
Examples:
- How-to guides
- Tutorials
- Reviews
- News
- Comparisons
- Blog articles
Pages
Pages are generally used for relatively permanent website information.
Examples:
- About
- Contact
- Privacy Policy
- Terms
- Disclaimer
The distinction isn’t an absolute rule, but this is a useful way for a beginner to think about it.
Common Questions About Installing WordPress
Is WordPress difficult to install?
For most beginners, no.
If your hosting provider offers an automatic WordPress installer, the process can be completed through a guided setup without coding.
Manual installation is more technical, but most beginners don’t need to use it.
How long does it take to install WordPress?
A normal automatic installation can take only a few minutes.
The exact time depends on your hosting provider and whether your domain is already connected correctly.
Manual installation takes longer because you need to handle files, the database and configuration yourself.
Do I need coding knowledge to install WordPress?
No.
You don’t need to know PHP, HTML, CSS, JavaScript or MySQL to install WordPress using a normal hosting installer.
Coding knowledge can be useful later if you want to customize your website, but it isn’t required to get started.
Can I install WordPress without hosting?
You can install WordPress in a local development environment on your computer, but that isn’t the same as having a public website.
If you want people on the internet to visit your website, you’ll normally need web hosting.
You’ll also normally want a domain name.
Can I install WordPress without a domain?
Yes, depending on the hosting environment.
You can sometimes access a website using a temporary URL provided by your host.
However, if you’re building a real public-facing blog, having your own domain is usually preferable.
Can I install WordPress after buying hosting?
Yes.
In fact, this is one of the most common setups.
You purchase hosting, connect your domain, and then use your hosting provider’s WordPress installer.
How do I install WordPress on Hostinger?
If you’re using Hostinger, log into your hosting account and look for its WordPress/Auto Installer.
The current Hostinger process allows you to select WordPress, choose your domain and enter administrator information before completing the installation.
The exact dashboard can change over time, so follow the current options shown in your Hostinger account.
How do I install WordPress using cPanel?
If your hosting provides cPanel, you can often install WordPress using Softaculous or another application installer.
The typical process is:
cPanel → Softaculous → WordPress → Install → Select domain → Enter administrator details → Install
The exact interface depends on your hosting provider.
Where do I log in after installing WordPress?
The standard WordPress administration URL is:
Replace yourdomain.com with your own domain.
What should I do immediately after installing WordPress?
At minimum:
- Check HTTPS
- Check your website URL
- Set the site title
- Set the correct timezone
- Configure permalinks
- Create a backup
- Choose a theme
- Install only essential plugins
- Create important pages
- Connect Search Console and analytics
Then start working on your content.
Should I install WordPress manually?
Usually not if you’re a beginner.
If your hosting provider has an automatic installer, use it.
Manual installation is useful when you need more control or your hosting environment doesn’t provide an automatic installation option.
Is WordPress free?
Yes.
The WordPress software is free and open source.
You still normally need to pay for hosting and a domain when building a self-hosted website.
You may also choose to pay for premium themes, plugins and other services.
Pros and Cons of Installing WordPress
A Complete WordPress Installation Checklist
If you’re installing WordPress for the first time, save this checklist.
Before installation
- Choose your domain
- Purchase suitable hosting
- Connect the domain to your hosting
- Confirm your hosting supports WordPress
- Have an administrator email ready
- Prepare a strong password
During installation
- Select the correct domain
- Choose HTTPS where available
- Don’t accidentally install WordPress in a subfolder
- Use a unique administrator username
- Use a strong password
- Enter the correct administrator email
- Complete the installation
After installation
- Open your website
- Log into
/wp-admin - Check HTTPS
- Set the site title
- Set the correct timezone
- Configure permalinks
- Delete unwanted default content
- Choose a theme
- Install only necessary plugins
- Set up backups
- Update WordPress
- Update themes and plugins
- Create essential pages
- Configure navigation
- Connect Search Console
- Check the mobile version
- Test contact forms
- Start planning your content
So, What Is the Best Way to Install WordPress?
For most beginners, the answer is straightforward:
Use the WordPress installer provided by your hosting company.
You don’t need to manually download files, create databases or edit configuration files unless you have a specific reason to do so.
The automatic installer handles much of the technical work and lets you concentrate on what actually matters: building your website.
If your hosting uses cPanel, Softaculous is another simple option.
Manual installation is useful to understand, but it isn’t something you need to choose just because you’re serious about blogging.
Final Thoughts
Installing WordPress may look intimidating when you see words such as PHP, MySQL, databases and configuration files.
But for most new bloggers, the actual process is much simpler.
If you have a domain and suitable hosting, you can usually install WordPress through your hosting dashboard without writing a single line of code.
The important thing is not to stop at the installation screen.
After WordPress is installed, take some time to:
Secure it → configure it → create backups → choose a suitable theme → install only necessary plugins → create essential pages → connect your analytics tools → start publishing useful content.
And remember one important thing:
You don’t need a perfect website before publishing your first article.
Your website will change as you learn.
Your design will improve.
Your content strategy will evolve.
You may change themes, add new features and reorganize your navigation later.
That’s completely normal.
The purpose of your first WordPress installation is simply to give you a solid foundation from which you can build.
Once that foundation is ready, the next important question isn’t:
“Which plugin should I install next?”
It’s:
“What useful information can I publish that will genuinely help my readers?”
That’s where your real blogging journey begins.